![]()
Working with Metadata Definitions
Note: Only members of the Administrator User Group and those defined in the Manage Members for Role: Metadata-Admin screen can view, add, or edit metadata definitions. See Also: Using the Roles Screens
Adding a Metadata Definition
Use the Add Metadata Properties screen to define metadata (such as keywords and title). You can define as many instances of metadata as you wish.
If your site supports multiple languages, you create metadata definitions for each supported language.
See Also: Working with Metadata

To define a metadata definition, follow these steps.
Warning! After creating a definition, you must assign it to folders whose content should use it. You do this via the folder’s properties. See Assigning Metadata to a Folder.
1. From the Workarea’s left frame, choose Settings > Configuration > Metadata Definition.
2. The View Metadata Definitions screen appears.
3. Select the language for the metadata you are about to define. This metadata will be available only to content in this language.
4. Click Add Metadata Definition ( ).
).
5. The Add Metadata Definition screen appears. Using the following table, add the needed information.
After you create a metadata definition, you may see the following error in the Windows Event Viewer Log.
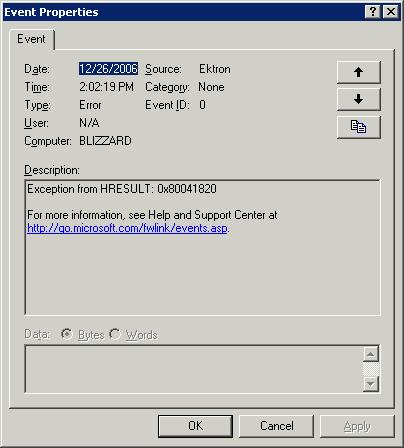
To learn more about this problem and how to resolve it, see the following Microsoft KB article: http://support.microsoft.com/kb/310680.
Metadata Definition Fields
|
Field |
Description |
|
Name |
Enter a name to identify this metadata. Note: Searchable metadata field names should not include a space. If they do, the search cannot find the metadata. Ektron CMS400.NET reserves a list of names that you cannot use. If you enter one of them, the following error message appears when you try to save the definition.
|
|
Type |
From the drop-down list, select whether this tag is a searchable property - See Also: Searchable Additional Fields an HTML tag (for example, <title>) - See Also: HTML Tag Additional Field and Related Content Metadata a Meta tag (<meta>) - See Also: Meta Tag Additional Fields and Related Content Metadata Collection Selector, ListSummary Selector, Content Selector, Image selector, Hyperlink Selector, File Selector - See Also: Related Content Metadata |
|
Editable |
Check this box if you want to allow users to edit the contents of the metadata when creating or editing the metadata. Uncheck this box if you want uniform metadata text for each content item that uses this metadata. |
HTML Tag Additional Field
See Also: Related Content Metadata
|
Field |
Description |
|
Default Text |
Enter default content for the HTML tag. For example: content="document management web content management content management cms" |
Meta Tag Additional Fields
Note: For background information about metadata, see http://www.w3.org/TR/REC-html40/struct/global.html#edef-META.
See Also: Related Content Metadata
|
Field |
Description |
|
Select from the drop-down list to indicate whether you want the style to be name or http-equiv. For more information, see http://www.w3c.org/TR/REC-html40/struct/global.html#h-7.4.4.2 |
|
|
Remove Duplicates |
Check this box to remove duplicate words or phrases from the metadata. |
|
Case Sensitive |
Check this box to remove duplicates only if the letters and case of each letter match. |
|
Separator |
Enter a character to separate the metadata values. The default is a semicolon (;). |
|
Selectable Metadata |
Check this box to force users to select from the options specified in the Allow Selectable Text and Default Text fields. If you do not check this box, users can create their own metadata. |
|
Allow Multiple Selections |
Check this box to let users select multiple metadata values instead of one. If multiple values are allowed, use the separator character to delimit them. If this box is not checked, all values appears in a drop-down list, and the user selects the correct one. This field is only active if the Selectable Metadata box is checked. |
|
Allowed Selectable Text |
Enter standard metadata that can be selected by users. Separate each option by the separator specified for the metadata definition. This field is only active if the Selectable Metadata box is checked. |
|
Default Text |
Enter default content for the metadata tag. |
Searchable Additional Fields
|
Field |
Description |
|
If you check the box, site visitors can find the metadata value when searching your Web site. Otherwise, site visitors cannot find the metadata value. Note: Regardless of whether this is checked, this metadata value can be found using the Workarea’s Search Content Folder screen. Only logged-in users can access the Workarea. |
|
|
Select the style of the response field from these choices (available in a dropdown list). You are specifying the kind of information that a user adding searchable properties to content will enter to describe the data. Later, anyone using the search can search on that information. See Also: Assigning Metadata to a Folder Text - The user enters free text to describe the content. Number - The user enters a number to describe the content. Byte - 1 byte. 0 through 255 (unsigned) Double - 8 bytes. -1.79769313486231570E+308 through -4.94065645841246544E-324 † for negative values; 4.94065645841246544E-324 through 1.79769313486231570E+308 † for positive values Float - (single-precision floating-point) 4 bytes. -3.4028235E+38 through -1.401298E-45 † for negative values; 1.401298E-45 through 3.4028235E+38 † for positive values Integer - 4 bytes. -2,147,483,648 through 2,147,483,647 (signed) Long - 8 bytes. -9,223,372,036,854,775,808 through 9,223,372,036,854,775,807 (9.2...E+18 †) (signed) Short - 2 bytes. -32,768 through 32,767 (signed) Date - The user enters a date to describe the content. Yes or No - The user answers yes or no to describe the content. For example, if the content describes automobile parts, the user could answer yes to include new and used parts or no to search for new parts only. Select from a list - The user picks a from a list to describe the content. For an illustration of this style on the Edit Content screen/Searchable Properties tab and the Web site search screen, see Select from a List. Multiple selections - The user selects an item from a dropdown list. For an illustration of this style on the Edit Content screen/Searchable Properties tab and the Web site search screen, see Multiple Selections. |
|
|
Default |
If desired, enter the most common response to this definition. The default value is automatically applied to all existing content within folders to which this definition is assigned. While editing content that uses this definition, a user can accept the default value or change it. |
Select from a List
Appearance on Edit Content Screen > Metadata Tab
Multiple Selections
Appearance on Edit Content Screen > Metadata Tab
Converting the Style of a Metadata Definition
This section explains how Ektron CMS400.NET handles changing the style of a searchable property type of metadata. For example, you create a definition to collect Part Number. Originally, the style is text, but you later decide its style should be number.
When you change the style of searchable property type metadata, Ektron CMS400.NET attempts to maintain any data stored in content blocks that use the definition. For example, if the data style was number and you change it to text, the number stored for that metadata definition is converted to text and maintained in all content that uses it.
However, sometimes Ektron CMS400.NET cannot maintain the data when you change the style. For example, if you change a metadata definition style from number to date, Ektron CMS400.NET cannot convert those styles. In this case, any data stored in metadata definitions is lost.
The following table illustrates all conversion scenarios and how Ektron CMS400.NET handles each one. It indicates whether data is maintained after you convert from a data style in the left column to a style to its right.
|
|
Text |
Number |
Date |
Boolean |
Single Select |
Multiple Select |
|
Text |
- |
OK |
OK |
NO |
NO |
NO |
|
Number |
OK |
- |
NO |
NO |
NO |
NO |
|
Date |
OK |
NO |
- |
NO |
NO |
NO |
|
Boolean |
OK |
NO |
NO |
- |
NO |
NO |
|
Single Select |
OK |
NO |
NO |
NO |
- |
OK |
|
Multiple Select |
OK |
NO |
NO |
NO |
NO |
- |
Table legend
OK - Data is maintained
NO - Data is lost during conversion
When you change the style of a metadata definition, the screen often gives you these choices:
Use existing data if possible, else default
Use default value
Following these choices is a field that lets you define a default value. If you want to simply replace any existing data, select Use default value and enter the new value in the Default field.
If the data is convertible (according to the table above), and you want to maintain existing data if possible, select Use existing data if possible, else default. Then, enter a default value below. If the existing data cannot be maintained, the default value replaces it.
Viewing Metadata Definitions
You may view any metadata definition. To do so, follow these steps.
1. From the Workarea’s left frame, choose Settings > Configuration > Metadata Definition.
2. The View Metadata Definitions screen appears.
3. Select a language from the drop-down list.
4. Click the Metadata definition you want to view.
5. The View Metadata Definition screen appears. From here, you can edit and delete this definition.
See Also: Metadata Definition Fields
Editing a Metadata Definition
Note: You cannot edit the definition for the following Ektron standard metadata: MapLatitude, MapLongitude, MapAddress, MapDate
To edit a metadata definition, follow these steps.
1. Access the View Metadata Definition screen whose definition you want to edit, as described in Viewing Metadata Definitions.
2. Click Edit ( ).
).
3. The Edit Metadata Definition screen is displayed.
4. Make the necessary changes to the definition.
See Also: Metadata Definition Fields
5. Click Update ( ).
).
What Happens When a Metadata Definition is Edited?
If you create a metadata definition, assign it to a folder, then users insert metadata information into their content, the collected information takes on the characteristics of the metadata definition. For example, if the metadata is title and its type is HTML tag, this is how it appears in the Web page’s source code.
<title>CMS Developer</title>
If you later change its type to Meta, the following effects occur:
metadata to which the definition has already been assigned maintains the previous style definition. For example, <title>CMS Developer</title>.
when you create a new content item that uses the metadata definition, its metadata takes on the new style. For example, <meta name="title" content="CMS developer">.
Deleting a Metadata Definition
You can remove metadata definitions that are no longer used from the Ektron CMS400.NET site. When you delete a definition, it is removed from every content item that uses it.
To delete a definition, follow these steps.
1. Access the View Metadata Definition screen for the definition, as described in Viewing Metadata Definitions.
2. Click Delete ( ).
).
3. A confirmation message is displayed.
4. Click OK.
5. Another confirmation message is displayed.
6. Click OK.
Assigning Metadata to a Folder
After creating a metadata definition (see Adding a Metadata Definition), assign it to folders whose content will use it.
On each folder’s properties screen, you determine which metadata definitions can be used.The section of the folder properties screen used to assign metadata appears below. Only metadata definitions whose Assigned box is checked can be completed by users working with content in the folder.
Then, while creating or updating content, the user can insert the metadata information via the Metadata tab (illustrated below).
Requiring Users to Enter Metadata
You can determine that a metadata value must be inserted before content can be saved (see the Required checkboxes in the illustration above). This occurs both when new content is added and existing content is edited.
If you set a kind of metadata to be required, its label is red and includes an asterisk (*) on the Metadata tab of the Edit Content screen, as shown below.
If the user does not complete a required metadata field, a message informs him that it must be completed before he can save the content.
Effect of a Default Value on Required Metadata
A default value can be defined when creating or editing a field within a metadata definition. See Also: Adding a Metadata Definition
If a default value is defined for a required metadata field, the default value is used when the user saves the content. In this case, the user is not prompted to enter a value because the default value is sufficient.
Inheritance of Metadata by Folder
Each folder can inherit metadata fields from its parent folder or have a unique set of them. The information includes the kinds of metadata that are assigned and which of those are required. For example, you could assign the top folder (Content) all metadata definitions, while you assign the Contacts folder (directly below it) none.
On every folder’s Metadata tab, use the Inherit Parent Configuration check box (illustrated below) to determine if metadata definitions are the same as the parent folder or unique.
By default, Inherit Parent Configuration is checked, which means that all folders inherit metadata definitions from the root folder (Content).
When you uncheck Inherit Parent Configuration, you can change the settings as desired. All inherited values appear by default (that is, Assigned and Required boxes are either checked or unchecked).
Adding Metadata to Content
When a user creates or updates content, he can define its metadata within the assignments specified for its folder. Default metadata values are applied without user intervention.
To enter or edit content’s metadata, follow these steps.
Warning! You may only edit metadata of content that is published, checked in, or checked out by you.
1. Access the Edit Content screen for the content whose metadata you want to enter or edit, as described in Editing HTML Content.
2. Click the Metadata tab.
3. The Edit Metadata screen opens with the current metadata displayed. In order to add metadata to content, an administrator must have created definitions for it in the language of the content.
Note: Your system administrator determines the appearance of the Metadata screen.
4. Edit the metadata. Note that
Required field labels are red and marked with an asterisk (*). You must place at least one response in such fields before you can save the metadata.
Your system administrator may prevent you from editing a field. In this case, the field has a gray background, and you cannot place the cursor there.
Fields may appear in two columns. In this case, the system administrator provides a list of terms that you can apply to the content. You can select terms from the list or enter free text.
One column is labeled Not Included and the other Included. Move terms between lists by clicking Add and Remove.
You may see a list of terms in one box, and a field labeled Text above it.
With such a list, you can
- add a new term by typing it into the Text field and clicking
- remove any term by selecting it and clicking Remove
- modify any term by selecting it. It appears within the Text field, where you can change it. Then, press the Edit button.
- restore the terms to their default settings by pressing the Default button
- change the sequence of terms by selecting one then pressing the up and down arrows ( )
)
If related content metadata is available for the content, its name appears followed by None Selected (ID) Change Clear.
Click Change to display a window of choices. For example, if the related content type is a collection, all collections appear in the popup. Select the appropriate data for this content.
Selected items appear in the bottom of the screen. You can reorder them by selecting an item then clicking the up and down arrows. To remove items from the bottom of the screen, select them and click Delete ().
If the related content type is either content item or library image, hyperlink, or file, the following window appears when you click Change.
Use this screen to identify the related content. To do this,
- Select a folder from the left frame
- Double click the related-content item from the top right frame
- The item appears in the lower right frame
- When all items are in the lower right frame, click Save () directly below Select Metadata
If default metadata is defined for a specific data type, you can click Default at the bottom of each field to restore it.
Below each field is a Characters Left field, which counts the number of metadata characters. You cannot exceed the maximum (500 characters).
5. Click Save ().
6. The View Content screen reappears.
The content is now in a checked out state to you. For the changes to take effect on the Web site, check in the content and submit it to the approval chain. See Also: Approval Chains


![]()